みんなー!うしるだよー☆
今回はねえ!はてなブログで「あわせて読みたい」みたいなリンクを強調する方法を紹介するの!
刮目して見てね♡
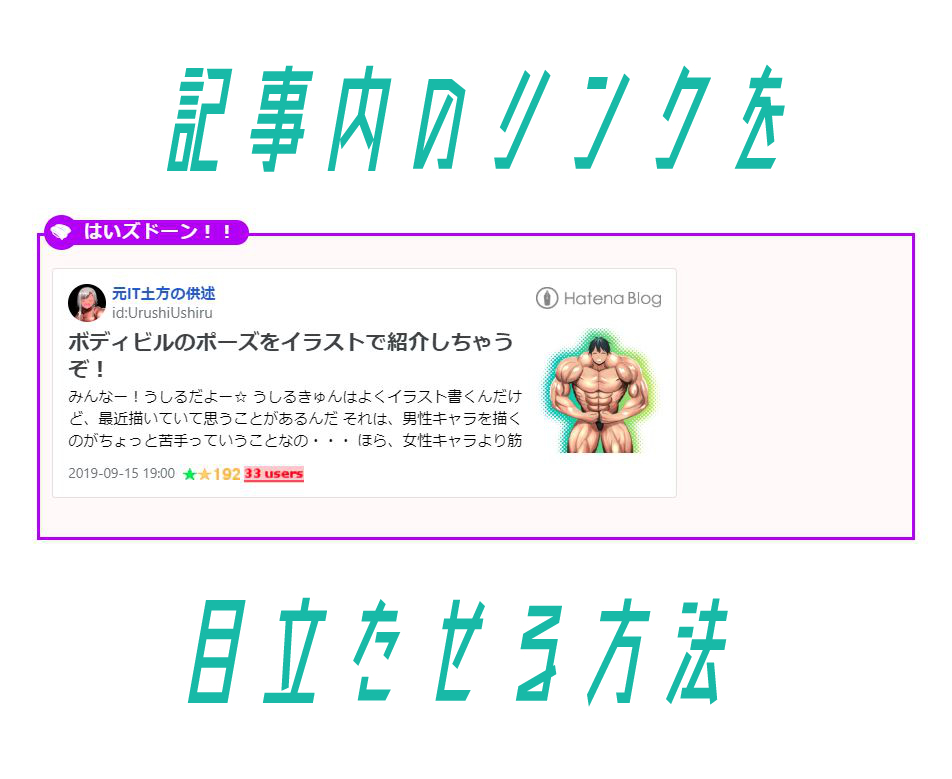
リンクを強調させたいの!
ブログの記事内であわせて読んで欲しい記事があって、リンクを貼り付けるなんてことがよくあると思います。しかし、そのまま貼り付けてしまうと▼のようにちょっと味気ない感じになってしまいます。
www.itjigoku.com
ブログカード形式ならまだいいですが、文字だけだと、▼のように、ただただリンクを踏めるだけの文字になってしまいます。
クレヨンしんちゃんの舞台「春日部」を聖地巡礼してきたゾ!
読んで欲しいリンクは目立たせてみましてみましょう。
リンク強調を導入するには▼の記事を参考に導入していきます。
www.notitle-weblog.com
リンク強調(あわせてよみたい)の導入
上記のようなデザインにリンクを強調させる方法を紹介します。
.entry-content .emphasize-link {
position: relative;
margin: 36px 0 16px;
padding: 16px 10px;
border: 2px solid #FF6200;
background-color: #fffbf5;
}
.entry-content .emphasize-link p:last-child {
margin-bottom: 0;
}
.entry-content .emphasize-link::before {
position: absolute;
top: -12px;
left: 10px;
padding: 0 10px 0 26px;
content: "あわせて読みたい";
background-color: #FF6200;
border-radius: 10px;
color: #fff;
font-size: 14px;
font-weight: bold;
line-height: 20px;
}
.entry-content .emphasize-link::after {
position: absolute;
top: -16px;
left: 4px;
width: 28px;
height: 28px;
background-color: #FF6200;
border-radius: 14px;
line-height: 25px;
text-align: center;
content: "\f010";
font-size: 18px;
font-family: "blogicon";
color: #fff;
}
リンク強調には上記のCSSコードを使用します。
ちなみに、5行目(#〇〇〇〇〇〇の値)が枠の色、6行目がが枠の中の色、17行目が「あわせて読みたい」の背景色、30行目がアイコンの背景色、34行目がアイコンWebフォントになります。
以下のカラーコードを参考にして好きな色に適宜変更してください。
www.colordic.org

はてなブログの管理画面にアクセスして、「デザイン」⇒「①スパナマーク」⇒「②デザインCSS」に上記のコードを貼り付けます。
「③変更を保存」をクリックして設定を保存します。
以上で設定は完了です。
ほ~ら、簡単でしょ!
スマホ版(Pro限定)の設定方法
こちらでは、スマホ版にも適用する方法を紹介します。
スマホ版では先程導入したCSSを「<style type="text/css">~<style>」で囲います。

はてなブログの管理画面にアクセスして「デザイン」⇒「①スマホマーク」⇒「②タイトル下」に上記の「<style type="text/css">~<style>」で囲ったCSSコードを貼り付けます。
以上でスマホ版での導入は完了です。
めっちゃ簡単でしょ!?
リンク強調の使用方法

リンク強調を使用するときは、ブログ記事編集画面にて「HTML編集」を選択して、吹き出しに使いたい文章やテキストを「<p class="emphasize-link">~</p>」で囲います。
詳しくは以下の使用例を見ていただいた方が分かりやすいと思います。
www.itjigoku.com
<p><iframe class="embed-card embed-blogcard" style="display: block; width: 100%; height: 190px; max-width: 500px; margin: 10px 0px;" title="『宮城蔵王キツネ村』という100匹以上のキツネが放し飼いされてる珍スポットに行ってきましたの! - 元IT土方の供述" src="https://hatenablog-parts.com/embed?url=https%3A%2F%2Fwww.itjigoku.com%2Fentry%2Ffoxvillage" frameborder="0" scrolling="no"></iframe><cite class="hatena-citation"><a href="https://www.itjigoku.com/entry/foxvillage">www.itjigoku.com</a></cite></p>
▼After
<p class="emphasize-link"><iframe class="embed-card embed-blogcard" style="display: block; width: 100%; height: 190px; max-width: 500px; margin: 10px 0px;" title="『宮城蔵王キツネ村』という100匹以上のキツネが放し飼いされてる珍スポットに行ってきましたの! - 元IT土方の供述" src="https://hatenablog-parts.com/embed?url=https%3A%2F%2Fwww.itjigoku.com%2Fentry%2Ffoxvillage" frameborder="0" scrolling="no"></iframe><cite class="hatena-citation"><a href="https://www.itjigoku.com/entry/foxvillage">www.itjigoku.com</a></cite></p>
上記のリンク強調の場合は 「<p>」タグを「<p class="emphasize-link">」に変更するだけです。
『宮城蔵王キツネ村』100匹以上のキツネが放し飼いされてる珍スポットに行ってきましたの!
<p><a href="https://www.itjigoku.com/entry/foxvillage">『宮城蔵王キツネ村』100匹以上のキツネが放し飼いされてる珍スポットに行ってきましたの!</a></p>
▼After
<p class="emphasize-link"><a href="https://www.itjigoku.com/entry/foxvillage">『宮城蔵王キツネ村』100匹以上のキツネが放し飼いされてる珍スポットに行ってきましたの!</a></p>
上記のリンク強調も同じく 「<p>」タグを「<p class="emphasize-link">」に変更するだけです。
複数リンクの場合
<p><a href="https://www.itjigoku.com/entry/ubayu-cycling">峠駅から姥湯温泉まで標高差700mの激坂をサイクリングしてきましたの!</a></p>
<p><a href="https://www.itjigoku.com/entry/ubayu-onsen">『姥湯温泉』標高1300mにある混浴露天風呂に入浴してきましたの!</a></p>
▼After
<div class="emphasize-link">
<p><a href="https://www.itjigoku.com/entry/ubayu-cycling">峠駅から姥湯温泉まで標高差700mの激坂をサイクリングしてきましたの!</a></p>
<p><a href="https://www.itjigoku.com/entry/ubayu-onsen">『姥湯温泉』標高1300mにある混浴露天風呂に入浴してきましたの!</a></p>
</div>
複数リンクを強調したい場合は、リンクを「<div class="emphasize-link">~</div>」で囲えばOKです。
リンクによってボックスのデザインを変化させる方法
ここではリンクによってリンク強調のボックスのデザインを変化させる方法を紹介します。
.entry-content .chal-link {
position: relative;
margin: 36px 0 16px;
padding: 16px 10px;
border: 2px solid #AE2B52;
background-color: #fffbf5;
}
.entry-content .chal-link p:last-child {
margin-bottom: 0;
}
.entry-content .chal-link::before {
position: absolute;
top: -12px;
left: 10px;
padding: 0 10px 0 26px;
content: "あわせて読みなさいよね!";
background-color: #AE2B52;
border-radius: 10px;
color: #fff;
font-size: 14px;
font-weight: bold;
line-height: 20px;
}
.entry-content .chal-link::after {
position: absolute;
top: -16px;
left: 4px;
width: 28px;
height: 28px;
background-color: #AE2B52;
border-radius: 14px;
line-height: 25px;
text-align: center;
content: "\f715";
font-size: 18px;
font-family: "blogicon";
color: #fff;
}
「.emphasize-link」から「.chal-link」とクラス名を変更(自分が分かるタグ名に適宜変更)し、これまでと同じ手順でダッシュボードに貼り付けます。
ちなみにこのボックスは、「あわせて読みたい」の文、枠内以外の色、アイコンWebフォントを変更しています。
www.charlottehibi.com
<p><iframe class="embed-card embed-blogcard" style="display: block; width: 100%; height: 190px; max-width: 500px; margin: 10px 0px;" title="本格的なネパール料理が味わえる『エベレスト(EVEREST)』に行ってきたわ!【仙台市宮城野区鉄砲町】 - シャルの甘美なる日々" src="https://hatenablog-parts.com/embed?url=https%3A%2F%2Fwww.charlottehibi.com%2Fentry%2Feverest" frameborder="0" scrolling="no"></iframe><cite class="hatena-citation"><a href="https://www.charlottehibi.com/entry/everest">www.charlottehibi.com</a></cite></p>
▼After
<p class="chal-link"><iframe class="embed-card embed-blogcard" style="display: block; width: 100%; height: 190px; max-width: 500px; margin: 10px 0px;" title="本格的なネパール料理が味わえる『エベレスト(EVEREST)』に行ってきたわ!【仙台市宮城野区鉄砲町】 - シャルの甘美なる日々" src="https://hatenablog-parts.com/embed?url=https%3A%2F%2Fwww.charlottehibi.com%2Fentry%2Feverest" frameborder="0" scrolling="no"></iframe><cite class="hatena-citation"><a href="https://www.charlottehibi.com/entry/everest">www.charlottehibi.com</a></cite></p>
上記のボックスの場合は 「<p>」タグを「<p class="chal-link">」に変更するだけです。
変更したクラス名に対応するように「<p>」タグを変更すればリンクによってボックスのデザインを変更することが出来ます。
まとめ
リンクを強調するのはめっちゃ簡単だったでしょ?
みんなもうしるきゅんの記事を読んで導入してみてね!
そ・れ・と♡
うしるきゅんの一生懸命描いた筋肉も見てあげてね♡
最後まで読んでいただきありがとうございました♡


